14 April 2013

Martin's Soup

On a recent* trip to Portland to visit with some friends, we stopped by Martin's house for some dinner. Martin is a lanky barefoot support system for an impish grin and is frequently draped in a serape. If you've any connection with Free Geek in PDX, chances are you know him. What I didn't know, after close to 10 years of his acquaintance, is that he's a fine cook.

Martin had prepared an enormous pot of vegan soup that filled the kitchen with the rich smell of spices. I'll be honest, when I saw the soup contained cauliflower**, I took the first bowl simply because I was hungry and wanted to be polite. I devoured the second bowl because it was so delicious. The third bowl I savored, attempting to work out the ingredients. I asked Martin for the recipe, and he eventually provided one in the kind of short hand used by those of us how cook often, and improvise regularly.

In an effort to share this wonderful soup with a wider audience I've taken the liberty of filling in some details and adding some measurements for those of my readers who are more comfortable with recipes that are more procedural. Feel free to embellish and experiment with the ingredients, I think it would very much be in the spirit of what Martin has created. Personally, I think the addition of Portuguese Sausage would be very nice, but then it wouldn't be Vegan, and it might be less in the spirit of Martin's work.

  • 3 potatoes
  • half a head of cauliflower
  • 2 carrots
  • 3 celery stalks
  • 1 onion
  • 6 cloves of garlic
  • 2 cups of wine
  • 4 Tblspn of olive oil
  • .33 cup of nutritional yeast
  • 1 tablespoon of curry powder
  • 1 teaspoon of cumin
  • 1 can of diced tomato
  • 2 cups of yellow split peas
  • Water (or stock) to level of desired soup

Chop up your celery, carrots and onions into a small dice. Congratulations, you just made Mirepoix. Now you're cooking like a fancy French lad.
Mirepoix
 In a large stock pot, heat up your fat of choice. If you're going Vegan, use olive oil. If you're not Vegan, feel free to use butter or bacon fat. Whichever you choose, don't skimp, this recipe will soak up a lot of fat, and that's good. When the fat is good and ready, drop in the Mirepoix and saute for several minutes, until the vegetables are soft and translucent. Add the garlic and some salt and pepper to season. The longer you saute and caramelize these vegetables, the richer your soup will end up. Careful not to cook them too long though, or it will burn.

Saute in lipid of choice
 While the Mirepoix is doing it's thing, chop up your cauliflower into a large rough dice. Make sure to pour all your hate and disgust for this pale imitator of broccoli into your chopping. Cauliflower is terrible and deserves your violence. It's okay, we'll make it taste better later.

Cauliflower; after dismemberment
Dice up your potatoes into a medium dice. Treat the potatoes with the love and attention they deserve that cauliflower never gets and doesn't deserve.

White on white bowl. Not a great color mix.
 Rinse the yellow split peas and pick them over for any small stones, bad peas, or hidden treasure. If you can't find yellow split peas, use red ones or green ones. The flavor will be mostly the same, but the color will be different. Don't use lentils. Lentils cook a little differently.

Split peas
Check on your Mirepoix. Is it coming along nicely? Yes. Yes it is.


Here's where we start to really develop the flavor of this soup. Wine. Delicious yummy wine. Notice that I've spared no expense and chosen a wine in a box. The kind of wine you use is somewhat immaterial. You'll want a white wine for this soup, preferably something dry. I've selected the Chardonnay carton. You wouldn't want to use a wine you wouldn't drink, but it doesn't have to be a very good wine, as we'll be evaporating most of it off.

The Bandit. A juice box for adults. It doesn't come with a straw.
Pour the wine in and let it cook down significantly, by half or more. You want a nice rich syrup in the pot. You can see here what's left of reducing 2 cups of wine. This is good.

Reducing the wine. I dare you to not huff the fumes.
Now we introduce some seasoning and add more flavor. Toss in the Nutritional Yeast, Curry Powder, and Cumin and toast them in the pot for a minute or so. Be careful, the Nutritional Yeast will absorb all the remaining liquid and it burns quickly. Nutritional Yeast adds a tasty nutty flavor, it can be found in your natural market, or likely in your regular grocery wherever they hide the vegetarian or natural ingredients.

Our spices and additions
 Once the spices are toasted, stir in the split peas and then add water and or stock. You can really add as much or as little as you want here. This soup will stretch quite a bit, and it's all about how many people you're feeding and how much storage space you have in the fridge. Remember though, we still have more veggies to add, and the peas will expand. Don't worry, it's okay to add more later. If you're preparing this Vegan, either use all water, or mix in some vegetable stock. If you're not Vegan/Vegetarian, then chicken stock will work as well. When I use stock and water, I like to use a ratio of 1:1.

There are no more pictures. Sorry. I drank the rest of that box of wine and forgot to take more. Fortunately, this part is dead easy, and doesn't really need pictures.

Bring the peas to a boil, and reduce to a simmer. Cook until the peas are just done. How long this takes all depends on the peas. If the peas are old, it will take longer. Figure about 45 minutes to an hour on simmer.

Once the peas are satisfactory, add in the cauliflower, potatoes and tomatoes, return to a simmer and cook until the potatoes are tender but not falling apart. Add more liquid if necessary. Taste before you serve and add more salt or curry powder to taste.

Congratulations. You just made a pot of soup that could serve a squadron of teenagers, is packed with nutrition, very possibly is Vegan depending on your additions and choices, and it probably cost less than $10 to make.


*Last October, not really very recent.
**I am not a friend of cauliflower.

23 December 2011

Bacon Bourbon Pecan Pie

When I was 11 years old, a friend and I got individual snack sized pecan pies. His looked exactly like a miniature pecan pie should. Mine looked like a fuzzy mix between a science experiment and a Chia Pet. Pete was a year older than I, and being older and wiser, it made perfect sense when he suggested I just scrape off the mold and eat it anyway.

It was 20 years before I could eat pecan pie again.

Fortunately, much like my aversion to whiskey which was achieved by somewhat similar methodology, I eventually overcame my repulsion to pecan pie. Pecan pie is an American tradition of southern cooking that is widely popular during the holiday season. Like many American traditions, its origins are somewhat murky and romanticized with advocates refusing to believe it could possibly be a recent innovation designed as a marketing scheme for product promotion. All evidence suggests Pecan Pie was a 20th century innovation designed to sell Karo corn syrup. Sorry. That doesn't make it any less delicious though.

So if Pecan Pie is so delicious, why the need to constantly modify ingredients and ratios? Why are there so many different recipes? Two reasons. 1. Some people are just plain wrong. 2. Adding bacon and bourbon makes just about everything better.

Crust
1 1/4 cups of AP flour
1/2 tsp sugar
1/2 tsp salt
1/2 cup of cold solid fat (butter, bacon grease, lard, or {shudder} shortening)
3 tbsp of cold water


Start with the bacon. Line a baking tray with aluminum foil and pre heat your oven to 400f. Lay in 6 slices of bacon. Cooking time will vary depending on how thick your bacon is, how streaky it is, and how big your baking tray is. A good rule of thumb is to flip the bacon in the tray and rotate it every 10 minutes. 20 minutes is usually enough. Don't completely crisp the bacon up as you would for breakfast, otherwise your pie will get a slight burnt bacon flavor.

Lining the tray with foil makes for easy cleanup, and allows you to easily pour off the grease to save for later use. Cooking the bacon in the oven allows the bacon to cook evenly without curling up. If you really prefer to fry it, do so, I'm not your mother.


I use a scratch made pie crust because I think Pillsbury is part of an international conspiracy to make me fat and stupid, and because it tastes better. You can use a pre-made crust if you hate yourself, America, and good pie. Making your own crust will take about 30 extra minutes and allow you to tell everyone how you made the whole thing from scratch. Feel free to use a superior tone of voice, you've earned it.

In a big bowl whisk together the AP flour, salt and sugar. Using a pastry blender or two forks, cut the fat into the flour until the mixture comes together in small nodules from the size of a pea to the size of meal.

A word on fat. Shortening sucks. It is scientifically proven to make you obese. Bacon fat, lard and butter, on the other hand, are pretty good for you as long as you don't snack on them by the spoonful. Also, they are much more tasty than shortening. Each will yield slightly different textures. I like to use a half and half mixture of cold butter and cold bacon grease.

After the fat is cut in, sprinkle on the cold water in small amounts while tossing the dough with a spoon. How much water you'll need depends entirely on the humidity where you are. Start with 3 tablespoons, add more as needed until the dough starts to form together and clumps easily when squeezed. This is something you'll get better at the more you do, but is really hard to explain in text.

Dust your rolling surface with flour, and roll out your dough until it's large enough to fit in your pie pan with about an inch of overhang. Pat the dough gently into the pan, and trim the edges. Pinch along the rim to make a decorative edge.


Cover with aluminum foil and lay in some pie weights. If you don't have pie weights, you can use dried beans. Bake in your 400f oven for 20 minutes.

While the pie crust is baking, start on the filling.

2 cups pecan
1tbspn bacon grease
6 slices of bacon, cooked and chopped.
3 eggs
1/2 cup sugar
1/2 cup Maple syrup
1 cup corn syrup
5 tbsp butter
2 tsp vanilla
1/2 tsp salt
2 oz bourbon


Roughly chop the pecans. Mix the pecans with a tablespoon of bacon grease in a large non stick skillet. Heat over medium heat, to toast the nuts. Keep an eye on them, they will go from toasted to burnt very quickly.


In a large mixing bowl, whisk the eggs, salt and sugar until well combined. Melt the butter and whisk it into the eggs. Chop up the bacon you cooked and mix it, along with the rest of the ingredients into the egg mixture. When the pecans are toasted, set them aside until the pie crust is baked.


If you're a vegetarian, or for some other inexplicable reason don't want bacon in your pie, feel free to omit it. The real secret to the flavor here is the bourbon and the maple syrup.


When the pie crust is done, pull out the pie weights, and reduce the heat to 375f. Mix the pecans with the rest of the filling, and then pour it into the crust. Bake until the center quivers but is set, about 35-45 minutes.


Merry Christmas, you're now the most popular person you know.

01 May 2011

The Shooter's Sandwich

Considering the title and objectives of this blog, it's perhaps surprising that I've never before spoke of the Shooter's Sandwich. Let's remedy that, shall we?

The Shooter's Sandwich first came to my attention sometime in the late 90s by way of an episode of Two Fat Ladies. If you're familiar with the show, then you likely know that what follows is unlikely to be considered diet food. If you're not familiar with the show, you could probably deduce the same from the title which accurately described the two hosts. Fun Two Fat Lady fact; the surviving member of the pair's full name is Clarissa Theresa Philomena Aileen Mary Josephine Agnes Elsie Trilby Louise Esmerelda Dickson Wright, and prior to spending time homeless and as an alcoholic, was the youngest woman called to the Bar as a barrister in the United Kingdom.

According to the history I've heard, the Shooter's Sandwich was created in Britian as a hearty meal that could be easily transported and serve as a meal, or two, for a hunting party. The sandwich is, at it's most simple level, meat and a sauced mix of vegetables, crammed into an entire loaf of bread and then smashed for hours under a heavy weight and wrapped in layers of paper. You can use any meat that can be safely prepared raw, but as I understand it beef is traditional.

Ingredients

A loaf of bread
4-7 oz of butter
2 yummy steaks
Mushrooms
Garlic
Shallots
Stone ground mustard
Prepared Horseradish
Tarragon
Bourbon
Worcestershire sauce
salt and pepper


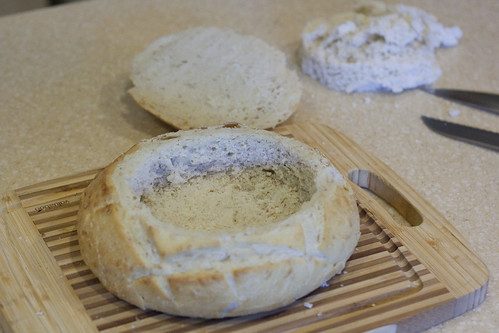
Start with a crusty loaf of bread approximately the same size as the cuts of meat you'll be using. You want a strong bread, because we're going to be abusing it. I've selected a large sourdough boule. Lop off the top of the loaf and scoop out most of the interior. Hooray! You've made a bread bowl. Save those crumbs if you want, we won't be using them. Set your steaks out to warm up on the counter, and give them a good sprinkling of salt. I'm using rib eye steak because it's the most flavorful of all the beef bits.

Prep the loaf

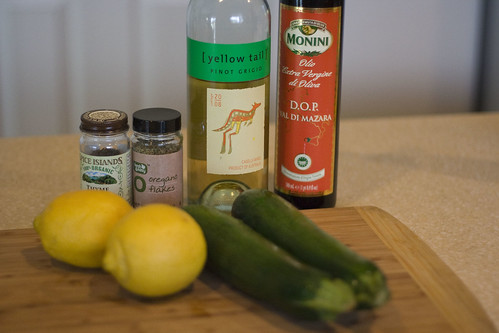
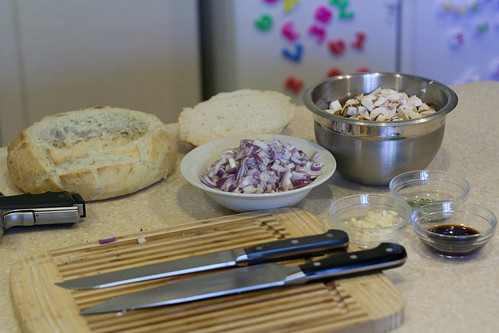
Time for your mise en place. That's a fancy French culinary term for getting your shit together. It helps. Mince up the shallots, and garlic, and roughly chop the mushrooms. I'm using about 6 cloves of garlic, 4 large shallots, 6 mini portabellas and 6 of whatever variety of generic white mushroom every grocery store seems to have on hand. There's also 2 teaspoons of tarragon, 2 tablespoons of Worcestershire, 1/3 cup of bourbon and an Armscor 1911 chambered in .45 ACP. The pistol isn't strictly necessary I guess.

Mise en place

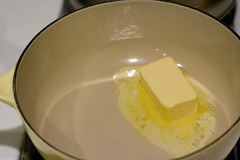
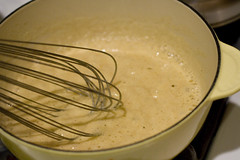
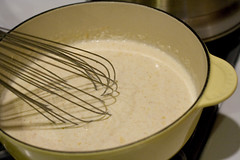
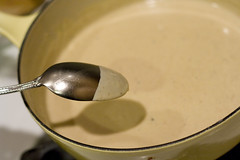
Melt the butter in a medium hot skillet and toss in the shallots and mushrooms. Don't add any seasoning yet. Cook the veggies until the volume is reduced considerably and most of the liquid is cooked off, stirring frequently. About 10 minutes. Toss in the garlic and Worcestershire sauce, and continue to cook until the liquid is mostly cooked off. Deglaze the pan with the bourbon, being careful not to set yourself or your kitchen on fire. The traditional alcohol to use here is cognac, but I'm not French and I drink bourbon. Continue to cook until most of the bourbon is cooked off. Take the pan off the heat, stir in the tarragon and give it salt and pepper to taste.

Soften the veggies

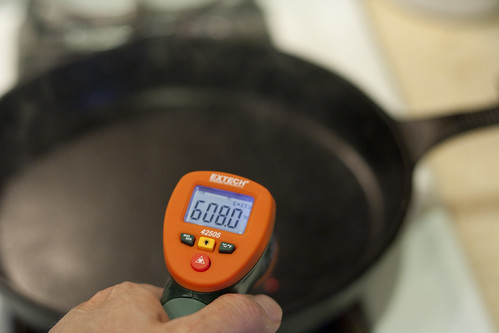
Get a skittle, preferably cast iron, and very hot. Don't screw around, you want that thing as screaming hot and dangerous as a junior varsity cheerleader. If you don't have a cast iron skillet, you can use an aluminum or stainless pan, as long as it isn't a non stick pan. Get a nonstick pan this hot and it releases toxic fumes. No, really.

If you don't have an appropriate skillet, cook it on the grill. If you don't an appropriate skillet or a grill, stop reading this article and go reflect on the errors you've made in your life.

Get pan smoking hot

Give your steaks a light rub of olive oil, you won't need a lot. Slap the steaks in the pan, and don't touch them. We're going for a high heat sear and we want the steaks to be about as rare as a unicorn on roller blades at a taco stand. If you're uncomfortable with that, I suggest you stop being such a whiner. If you're the kind of person to get squeamish about a rare steak, this sandwich may be too much for you. The more the beef is cooked, the less it will compress in the sandwich and more tough it will be when you eat it. About 90-120 seconds on a side should be enough. If you have an exhaust fan, now would be a good time to turn it on.

Sear steaks

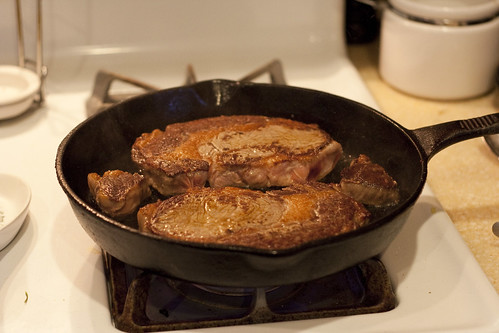
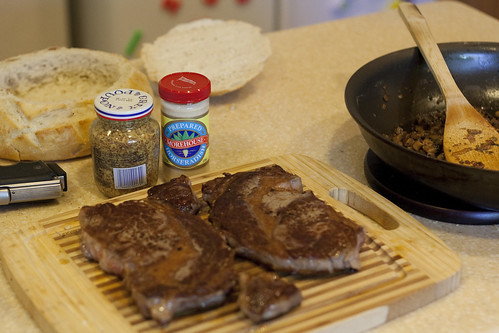
Look at that rich brown crust on those steaks. Now, this is important. Using all your will power, DO NOT eat those steaks. Also, don't let them cool or rest. You want them oozing juicy goodness into the sandwich.

Begin prep

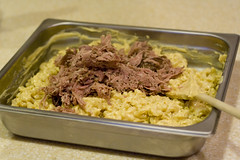
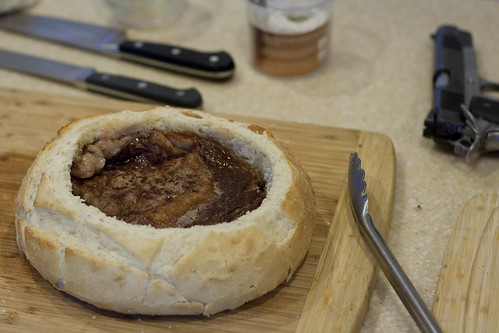
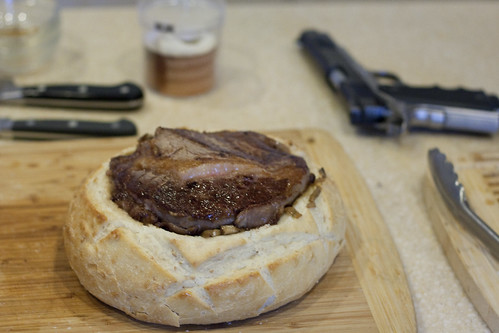
Cram the first steak into your bread bowl. There's no cause to be gentle. Treat it like the guy who dinged your car door at the grocery store.

Pack in the first steak

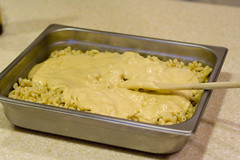
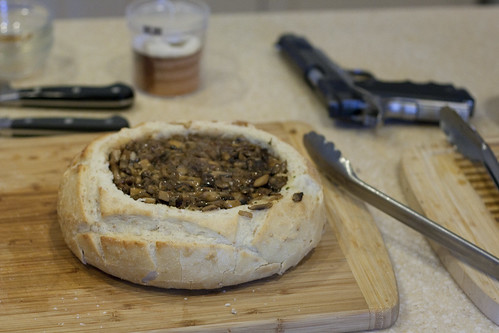
Layer in the veggie mixture. Hopefully you worked fast enough and it's still hot. At this point, the bread bowl is probably going to be looking a little full. That's okay. We're going to smoosh it all down later. That being said however, don't feel like you're compelled to use all of the veggies.

Pack in the veggies

Now jack in that other steak. It might take some work. Don't be afraid to show it the back of your hand.

Slap on the second steak

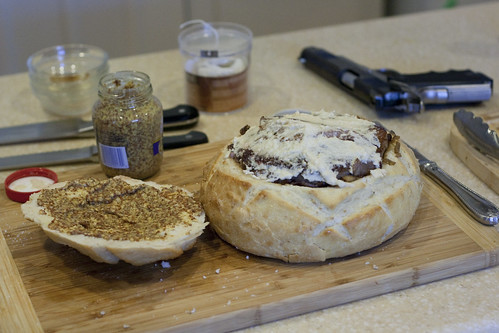
Smother the top of the steak with a thick layer of prepared horseradish. Slather the inside of the top of the loaf with mustard. Lay it on thick, like a Saturday morning lie.

Spread em

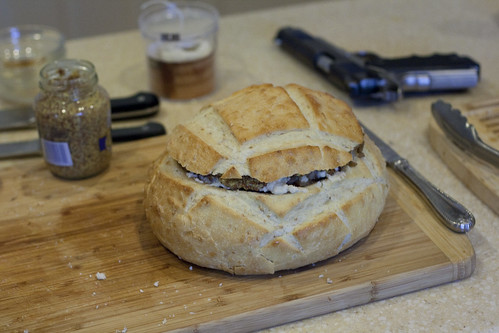
Place the top back on the loaf. Try to match it up so it's even. See? It all fit.

Replace cap.

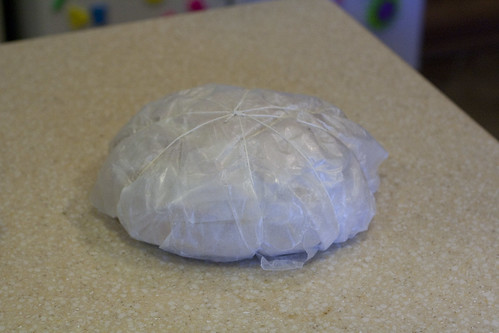
Wrap the load up in several layers of waxed paper and then bundle it up with butcher's twine. Tie it up tight, you want the pressure contained as evenly as possible.

Wrap

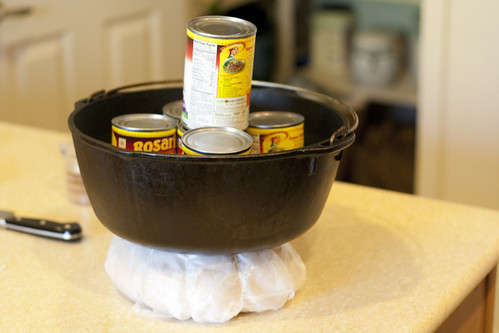
Put some heavy weights on top of the sandwich. I'm using a cast iron dutch oven filled with half a dozen cans of refried beans. That's about 16lbs. Heavier is probably better. Books also make good weights. I would advice against using anything filled with water, as the balance may shift and spill water everywhere.

Weigh it down.

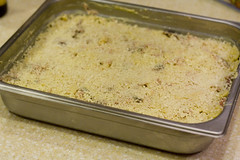
Now comes the really hard part. Wait at least six hours. At least six hours, but you can press it for longer if you desire. It doesn't need to be refrigerated, it's still cooking. When I cut into this one after six hours, it was still warm.

Slice and enjoy

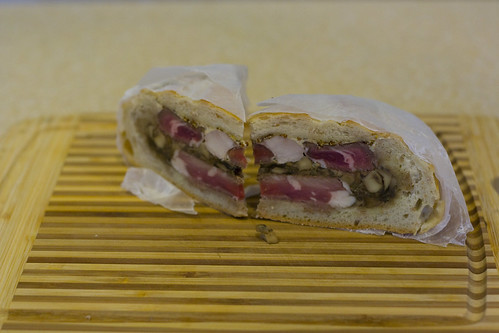
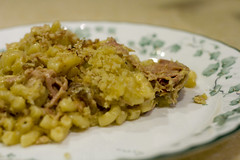
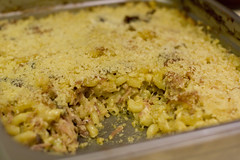
Once you're done pressing the sandwich, cut through the entire bundle, string and paper and everything, and slice the sandwiches into wedges. Revel in the delicious aromas that fill your head. Luxuriate in the earthy sweet flavor of mushrooms and beef. Don't forget to chew. Chewing is important. I recommend serving this delicious monster with beer, and for god's sake, don't try and eat it by yourself in a single seating. Remember, it is an entire loaf of bread stuffed with two steaks and a giant handful of vegetables and fungus.

02 February 2011

Creamed Brussels Sprouts

Brussels Sprouts get a bad rap. To be fair, that's because Brussels Sprouts are generally pretty damn terrible. At best they are bitter, at worst, damn near inedible. Generations of children have gone to bed hungry on the pointed threat of Brussels Sprouts. This is because Americans are terrified of undercooked food and tend to cook the living hell out of everything. When you over cook Brussels Sprouts, they release glucosinolate sinigrin which yields a sulfur odor and flavor. Unless you are Mestipholes, chances are you don't care for the odor or flavor of sulfur. Just between you and me, I think even he's getting kind of tired of it.

Brussels Sprouts don't have to taste like crap though. They can be delicious, and I'm going to show you how. Granted, I'm going to use some bacon and cream to do it, but you shouldn't argue with what works. If you're a vegetarian, and don't want to use bacon, that's cool, you can substitute crispy herbed croutons, or fried sliver of sweet potato, or, you know what? You can figure that part out yourself.

  • 2 tbs Apple cider vinegar
  • 8 slices of bacon
  • 4 slices of bread
  • 2 tbs butter
  • 1 large shallot minced
  • 10-12oz brussels sprouts. trimmed and shredded
  • 2/3 cup heavy cream
  • 1/3 cup water
  • 4 eggs
  • 1 tsp tarragon
  • salt and pepper to taste
  • Shredded Parmesan cheese for garnish

This recipe calls for two prepared ingredients that tend to give some people trouble, poached eggs and crisp bacon. Poached eggs can be tough, so many of the preparations sound like mystical nonsense, demanding you create a whirlpool of just the right rpm, or add precise measurements of acid to the water bath. Bacon, for all it's loved, is difficult to fry evenly in most pans, yielding curly strips that are burnt in the middle and soggy at the tips. Before I get into the nitty gritty of making the main dish here, I'm going to break down these two preparations in a way that is damned near foolproof.

Bacon. Line a baking tray with aluminum foil. Lay out some bacon. Put the pan in a 400f oven for 10 minutes. Flip the bacon over and rotate the tray, toss it back in for another 10 minutes. Bam. Done. You just cooked awesome bacon that is evenly crisp and straight as Sergeant Joe Friday. Bonus: once the drippings cool off, gently pull up the foil and pour the grease off into a washed out tuna tin. Not only do you now have a handy reservoir of bacon dripping for future sautes, but chances are, you don't have to wash that tray at all. How's that for handy?


Poached Eggs. Using some cooking spray, butter, or some of that awesome bacon grease you just made, slick up some condiment bowls and then crack an egg into it. Put the tiny bowls in a steam basket, cover it, and get it over some boiling water. Put on the lid and in 2-5 minutes, depending on how cold the eggs are and what elevation you're at, BAM, poached eggs. They slide right out. Don't have condiment bowls? Use a coffee mug or a saucer. No steam basket? Put em right in the bottom of a sauce pan with just enough water to get some steam up. Don't be afraid to experiment, eggs are cheap. Careful when you take them out though, they were in boiling water, so whatever you put the eggs in is probably hot.


Now that we got that out of the way, here's how to handle the rest of this recipe.

Prep your Brussels Sprouts by rinsing them off under cold water and pulling off the loose outer leaves. Cut them down the middle from stem to head, then shred the halves into ribbons. This is easy, but if you really hate chopping, you have terrible knives, or you lost all your fingers in a tragic kitchen accident, toss them in a food processor after cutting off the stems and pulse it a few seconds. You want ribbons, not Brussels Juice.


Mince up that shallot nice and fine. You'll notice that this photo does not feature a shallot. I thought I had a shallot. I was mistaken. I was very stern with myself when I discovered this. It's okay though, maybe you don't have a shallot either? I hear Sandusky banned shallots last year, so it's possible. Substitute half an onion and 2 cloves of garlic, minced really fine. It's not going to fool James Beard, but it will probably fool Rachael Ray.


In a 12" skillet saute the shallot in 2tbs of butter until soft. If you saved some of that awesome bacon grease, use 1tbs of butter and 1tbs of bacon drippings. This will take 2 - 3 minutes. No rush.

Cut that bacon up into 1/4" strips. Yummy.


Drop in the Brussel's Sprouts and toss to coat with whatever delicious fat you're using. Add in the vinegar, water, cream, and tarragon, mixing well to combine. Season with salt and pepper to your taste and cook for about a minute over medium heat. Cover and cook for another 5-7 minutes. Do not overcook. Remember that part about Brussels Sprouts smelling like the devil's backside, that happens after 7 minutes. Don't do that. In the last minute or so of cooking, mix in half the bacon.


Butter up and toast your bread under the broiler while the sprouts cook. I'm using sourdough bread here because it's awesome. If you were planning on serving this to A. A. Gill, then you should probably choose a more square type of bread, something fresh made with a subtle nuttiness that evokes harvest grains, and then cut into diagonals removing the crust.


Gently transfer a poached egg, with the yolk still runny, onto each piece of toast. Cover with the egg with the Brussels Sprouts, then garnish with the remaining bacon and the Parmesan cheese. Serve hot, let the yolk run.

Give that a taste.

And you thought you didn't like Brussels Sprouts.

13 April 2010

Pulled Pork Mac and Cheese

Pulled Pork mac and cheese

Macaroni and cheese is an essential element of comfort cooking. For many people, like myself, Kraft Mac and Cheese was a building block of our diets, not only growing up, but into early adult hood when budgets were tight and Kraft was cheap. Kraft Mac and Cheese is velvety smooth, cheesy, delicious, filling, and these days, mostly crap.

Even in the fancier organic mac and cheese boxes there is very little, if any, real cheese included. Even when there is, the ingredients have been processed to such a high degree that they barely resemble food at all. As much as I like the Kraft Mac and Cheese, still, I'm convinced that the packaging actually has more nutritional value than the contents.

Even if it did have real cheese, it doesn't come with pulled pork, and mine does. Making mac and cheese from scratch is easy, takes very little time, and delivers a far superior product. When it's done you can be relatively certain that it contains real food and no monosodium poisonate.

Ingredients

  • 16 oz of pasta cooked al dente
  • 4 oz to 16 oz pulled pork
  • 4 tablespoons butter
  • 1/4 cup flour
  • 2 cups heavy cream
  • 4 oz to ∞ of cheese
  • Panko bread crumbs
  • salt and pepper to taste


Preheat your oven to 350f. Drop your pasta in boiling water and cook until al dente, about 10 minutes. I like to use elbow macaroni or shells, but really any small pasta with lots of nooks will work well. Don't be afraid to experiment. When the pasta is done, drain it and toss it into a proper sized baking dish. I'm using a half steam pan.

Cooked pasta into the pan

In a sauce pan, melt the butter over medium heat, but don't let it brown You can really use any pan or skillet, but because we're making a sauce here, I prefer a proper sauce pan, one with gently sloping sides that allows the whisk to get in, and made of a heavy slow and even conductor. I'm using a La Creuset cast iron sauce pan here.

Melt the butter

When the butter is melted, dump in the flour and commence to whisking. Whisk away! Continue to whisk constantly for at least 2 minutes. Hooray! You just made a roux. Keep an eye on the temperature and the roux, if it starts to darken, turn down the heat a little. Keep whisking, don't stop. Cooking the roux for 2 minutes cooks out the flour taste. This is important if you don't want your mac and cheese to taste like glue. If you like the way glue tastes, I guess you don't have to bother.

Whisk in the flour

Pour in the cream, and keep whisking. As you whisk, the sauce will start to thicken. Depending on how warm the cream was relative to the roux, and how fast you poured it in, the sauce will either set up quickly or a little more slowly. If you attempted to use fat free milk, it will take longer and be terrible. Don't do that. Some people will say you should add in the cream slowly, or heat it up first. Since we're pumping this full of cheese and baking it later, this isn't really that important.

Pour in the cream and keep whisking

Hey, you just made a Bechamel sauce! You're a fancy French chef now. Go tell all your friends, but wait until we're done here first. You don't want to burn the sauce, and ruin all your new French Chef cred. The Bechamel, or sauce blanche, is one of the French mother sauces and is the basis for a number of super delicious sauces such as Mornay and Soubise sauce. You may have also noticed that it's basically just gravy. I just saved you three weeks of culinary school.

When the sauce is done to your desired consistency, coating the back of a spoon is a common test, lower the heat and pop in the cheese. Add the cheese in a bit at a time, other wise it will be hard to stir in smoothly and it may break or clump. Since you stuck a spoon in it, you might as well taste it. Resist the urge to eat it all. Add salt or pepper as you see fit.

Keep whisking until thickened

A word about cheese. Use a cheese that is a good melter. I like smoked gouda. Hard cheeses can be used, but will often yield a grainy texture after baking. I like to add a little manchego because I like the flavor. Cheddar is the typical American addition, and works, but it has a tendency to break more often in my opinion and why use cheddar when you can use something as tasty as smoked gouda? It's really a matter of taste though, as is the amount. The more cheese you put in, the cheesier your mac and cheese will be. 4 ounces is about the minimum and 8 ounces is a good place to stop before going crazy.

Pour in the cheese sauce.

When the cheese is all melted in to the sauce, pour it over the pasta and mix it up good. Toss in the pulled pork and mix to combine. Wait, you don't have pulled pork? I'm shocked. Shocked I tell you. Well, we'll cover that some other time. For now, reasonable pulled pork can be had at the grocery. I'm so embarrassed right now.

Pulled pork

Pat the mixture down evenly and, oh wait. Listen, the baking part. It's not really necessary. You can eat it just like that. Go ahead, I won't stop you. Baking does make it kinda tastier though. Still with me? Okay, pat the mixture down evenly and sprinkle the Panko bread crumbs in a layer over the top. I like to spritz it with a little olive oil too, just to make the crumbs crisper. Panko isn't necessary if you don't have any. Any bread crumbs will do, they just aren't as tasty. Hell, you can replace the bread crumbs altogether with crumbled bacon.

Cover in Panko

Pop the pan in the oven for 30 minutes and sit on your hands. You have to sit on your hands because your kitchen will start to smell like miracles and fairytales and you'll want to pull the mac and cheese out before it's done.

Just look at that cheesy goodnesss!

Serve immediately. Serves up to eight, or as few as one.

09 June 2009

Grilled Zucchini

For years I labored under the mistaken impression that I didn't like zucchini. I can't say for sure where this prejudice originated. If I forced at gunpoint to guess though, I'd say it was the result of a long standing disagreement I had with most, if not all, members of the squash family. This was a long standing conflict that only reached a period of truce when I stopped residing in my parents home.

This period of my life was known as The Decade Of Freedom From Vegetables And Experimentation With Scurvy. Most people call it bachelorhood. It was marked by dramatic increases in cheeseburgers and rib eyes, and a violent avoidance of most flora as a culinary option. This was an exciting period of my life that featured vitamin C deficiency and flirtation with gum disease. I don't really recommend it.

Over the last several years, as my quest to not die at an early age from nutritional deficiencies has really picked up steam, I've been reintroducing a variety of plants back into my life. I've yet to give okra another shot at the pennant, but several other previously vilified representatives of the plant world have been called up from the minor leagues. Among those was zucchini, and what I've come to realize is that zucchini is not bad, but it can be made badly. As it turns out, this is true of all food.

The following preparation was improvised for a cook out with friends several weeks ago. There were people in attendance who were not interested in eating meat, so I elected to prepare a meat free alternative. I'm a nice guy like that.

Ingredients
  • dried or fresh herbs (see below)
  • olive oil
  • lemons
  • white wine
  • salt
  • zucchini


Dried or fresh herbs? Man, that's a debate. I'm not going to get into it now. Just use whichever you like the most, or have available. For this particular batch I used thyme and oregano. In previous batches I used rosemary, savory, and thyme. Dill would probably be good too, but only if you liked dill. How much should you use? I'd say a tablespoon probably of each. Again, it depends on what you like, and keep in mind we're making a marinade here, not baking a cake. Is that vague enough?

User your microplane to get the zest o... What? You don't have a microplane? Go buy one. Right now. I'll wait.


Got it? Good. Now use your microplane to remove the zest from two lemons. Wait, you still don't have a microplane? Fine, if you really must, you can carefully slice off the zest with a sharp knife or vegetable peeler. Be careful about getting too much of the pith, the white rind, it's bitter. Seriously though, get a microplane, they're awesome and versatile.

Juice both of your naked lemons and add the zest to the lemon juice in a mixing bowl. Toss in the herbs with two generous pinches of salt. Now for the wine. You'll note that I've selected a Yellow Tail Pinot Grigio. I've selected this wine because that's what was in my pantry. Feel free to use a chardonnay, riesling, or really any other white wine. My only caution here would be to avoid the old wives tale about not cooking with wine you would drink. It's silly. You want to cook with wine that tastes good, but balance that with some sense. You don't want to use a Joseph Drouhin Montrachet Marquis de Laguiche 2006 in a clam sauce. So, I tend to keep some value wines around for cooking.

Whatever wine you choose, add about 1/2 a cup to the mixing bowl. Whisk to combine, and then whisk in several healthy tablespoons of good olive oil. I'm using a Sicilian Val Di Mazara, just because that's the way I roll. Whisk everything in the mixing bowl real good. Don't kill yourself, you could mix this with a boat motor and wouldn't integrate, we haven't included anything that will work as an emulsifier, so that lemon juice and wine will never combine with the oil totally.


Wash your zucchini up, and trim off the ends, but don't peel it. We need that green skin left on to give it some structure and prevent it from falling apart when we get to the grilling. Cut the zucchini lengthwise in slices that are about 1/4 inch thick. If you cut them too thin, then they'll go all floppy when they cook and turn to mush. I'm only using two zucchini here, because there's only two people in my house. We've made enough marinade for 4-6 zucchini depending on how big they are and how thick you decide to slice them. 4 zucchini is enough to feed 8 people if this is going to be a side dish, 4 if it's an entree.


Once your zucchini is all sliced up, toss them into a gallon sized ziplock bag and then pour in your marinade. If you had to, you could do this in a glass or plastic tray or bowl, but I wouldn't recommend it. The bags are the best way to marinade anything in my opinion. If you use a bag, that's one more dish you don't have to wash. Just be sure not to use an aluminium pan for the marinading. There's a lot of acid in this marinade, and it will react with the aluminium and make everything taste funny as well as maybe ruin your pan if you leave the marinade in long enough. Once the bag is sealed, slosh everything around and try to separate the zucchini slices, they'll try their darndest to stick together.


Now's the easy part. Wait.


Just let that bag sit on the counter for a while. Anywhere from 1/2 an hour up to a few hours. I wouldn't leave it in there for much more than 2 hours though. While you're waiting, you can heat up your grill. You want those grates nice and hot to leave some pleasant looking, and tasting, grill marks. Once your grill is hot and you're done waiting on your marinade, pull the slices out of your bag with some tongs and lay them on the grill. Turn them over after a few minutes, they won't take long.


What? You don't have a grill either? Good gravy. Alright. You can do it in your broiler. After all, a broiler is just an upside down grill, right? It won't be as nice and you won't get those tasty grill marks though. Lay the slices out on in a single layer on a baking sheet and place them on the highest rack in your oven under the broiler set to high. Keep an eye on them, and in a minute or two, turn them over and repeat. Do us both a favor though, and get a grill.


Voila! All done. These make a great side dish for a cookout. They are also a fantastic condiment for a grilled sausage or a bratwurst on a bun. Let em cool, and you can make a tasty vegetarian sandwich with them. Or, you can just take a fork and dig in.